How does file provisioning work?
If authentication on your Steeple community works with the classic method or personnel numbers, you can invite your employees via a file, and perform several actions detailed below.
Feature Description
File provisioning, or import, allows you to add, modify or delete employees in bulk, rather than one employee at a time.
From your Administration area, access to this feature is done from the Employees page, via Actions > File provisioning.
This page displays the history of past or pending processing.
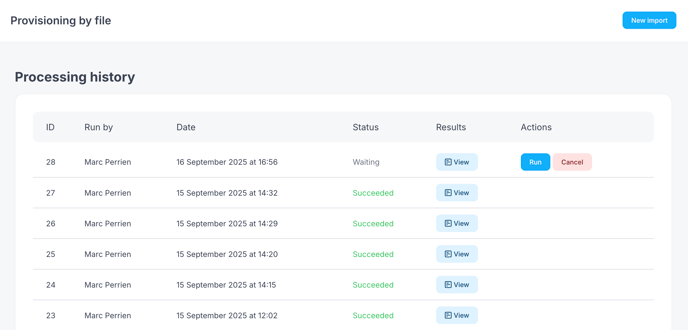
To start a new import, click on the New import button at the top right.
Depending on the type of processing you want to perform, three options are available.
Choose your sync type
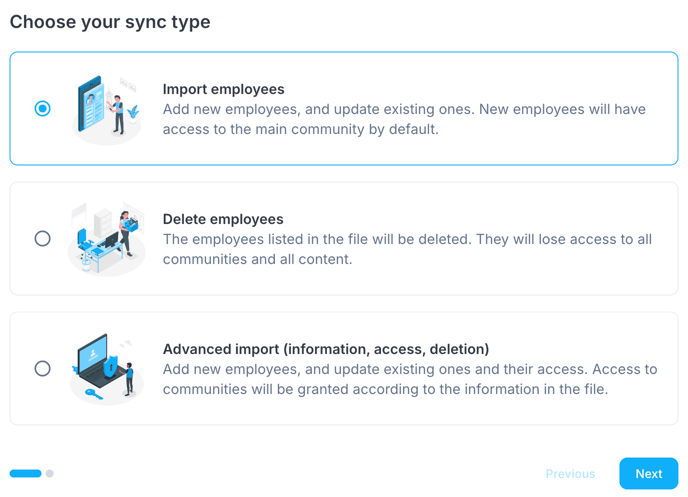
You want to add employees, or modify existing employees
Choose the Import employees option. New employees in your file will be created, and those already existing in Steeple will have their information updated with that from the file.
All new employees will be members of the main community. You can then manually add them to other communities.
You want to delete employees
Choose the Delete employees option. Your file is then a list of unique identifiers (employee number or email) of the employees to be deleted.
All employees in this list will be permanently deleted. Their publications will remain visible in Steeple (their author will be indicated as a “former employee”).
⚠️Advanced Import
The third option, Advanced Import, allows you to perform the previous actions in a single file, and offers access to additional options.
Warning: if misused, advanced import can lead to permanent data loss. It is not recommended to use advanced import without first ensuring the conformity of your file with the desired result.
By default, advanced import will:
- update existing employee data, including their access to different communities.
- create accounts for employees who are in the file but not already in Steeple, including giving them access to communities other than the main community.
At the second step of the processing, which we will discuss next, an option “Delete employees who are not in the file” will, in addition to the previous processing, delete all employees from Steeple who are not in the file. For example, if you have 200 employees in Steeple and 50 employees to update in your file, choosing this option will result in the permanent deletion of 150 employees.
Uploading your file
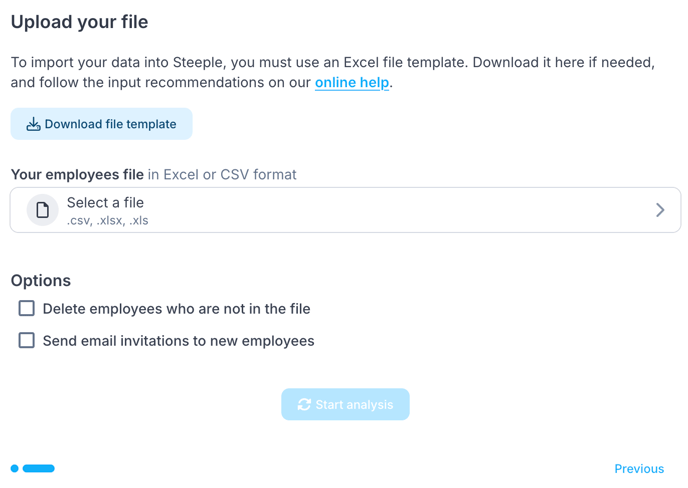
If you haven't done so during a previous import, now is the time to download the file template to complete. This is an Excel file in .xlsx format. The columns of the template depend on the import type chosen in the previous step.
You must then select your employee file that will be used for processing. It must correspond to the template provided by Steeple. The .xls, .xlsx, and .csv formats are supported.
Before starting the analysis, you can activate different options.
If you have chosen advanced import, you can check the “Delete employees who are not in the file” box. Warning: as previously noted, this option can lead to the permanent deletion of employees from your Steeple database.
You can also check the “Send invitations by email to new employees” box. If you do not check this box, you will be able to send the emails later, for example if you are adding your employees before the launch of Steeple.
Analysis
Clicking on “Start analysis” will trigger an analysis of your file and a processing simulation. This step is important: it allows you to ensure that the actions that will be performed are indeed those expected.
The analysis has two sections: an analysis of your file's conformity, and a summary of the simulation.

The alerts report lists the non-compliant columns in your file.
This could be a warning: for example, if a column is not recognized. Warnings do not prevent your processing from running.
If your file contains errors, however, the processing cannot continue.
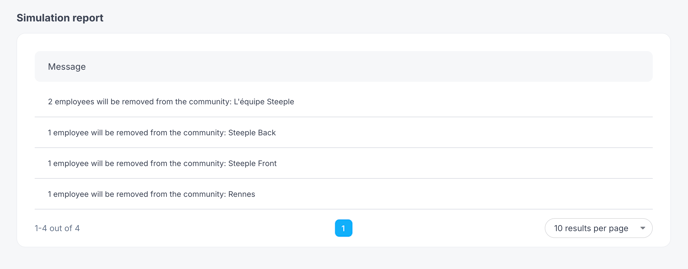
The simulation report is a summary of the different actions that will be performed during the final processing of your file. In particular, it indicates, for each community including the main community:
- the number of employees who will be added
- the number of employees who will be removed
This allows you to validate that the upcoming processing will have the expected result: if you have selected advanced import and the report announces the deletion of 200 employees from your main community, there may be a problem.
Note that the sum of employees added (or removed) in sub-communities may be greater than the sum of employees added. If an employee is added to two communities, they will be counted on three lines: that of the main community, and one for each sub-community.
Launch the actual sync
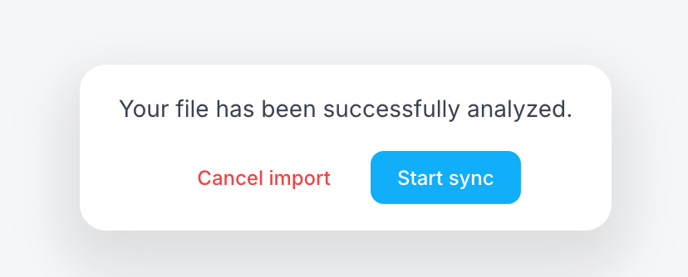
Two buttons at the bottom of the screen allow you to either cancel the import or launch the definitive processing, which will apply the changes indicated in the analysis report.
You can also click on “Back” at the top left of the page to return to the list of imports. You can then launch (or cancel) the import later.
Managing the file to be imported
An example file (or "template") is available to ensure that the data, formats, constraints, etc., match the desired result. This file can be accessed directly on the interface in the top left by clicking on Download file template.
Here's what you need to know about this file and its columns:
-
The imported file must be in CSV UTF8 (comma-separated) or XLSX format.
-
The order of the columns is not constrained; they can appear in a different order than in the template.
-
The Last Name and First Name columns are mandatory, as are Employee ID and Date of Birth if you use them to authenticate your employees.
-
The Administrator column, in the case of a multi-community organization, only grants "Global Admin" rights. To grant administrator rights for a community other than the main one, follow this explanation.
-
If you include a "Department" or "Location" column in your file, unrecognized departments and locations (even with the same spelling as in the list of departments) will be created during the import.
-
Columns added to the example file (thus containing unexpected data) will not be processed.
-
Any number of "community" columns can be added, provided the name of these columns adheres to the expected format.
-
CAUTION: One "Community" column must correspond to ONE community. If your company has multiple communities, then you must have as many columns as communities.
-
-
Information not provided in an optional field behaves in 2 ways:
-
Does not overwrite information already present in the application: employee ID, date of birth, administrator, bio, phone, community.
-
Clears information already present: company entry date, location, department, position, manager's email, company entry date.
-
-
The name of the columns is translated into the different languages supported by the platform (ES, EN, FR, DE); it must therefore correspond to the language of the main community.
The format of the various fields in the file (especially those containing numbers) must be in text format. Otherwise, error messages may appear (see below).
Optional fields
If your organization is configured to work in SSO connection mode (integration installed and default connection mode of the organization activated in SSO), then you can import 2 additional fields:
-
"SSO Login Method": column that must contain yes/no, and which will force or not force the user to connect via SSO.
-
"SSO Identifier": text field that must contain the SSO identifier used by the employee when they authenticate in your directory interface (Okta, Microsoft, or Google).
In case of a reserved domain name in the SSO integration, only SSO Identifiers for that domain name will be authorized.
The name of these optional columns depends on the language of your main community. Here is their translation into other languages:
-
Catalan
-
"SSO Login Method":
Mètode d'inici de sessió SSO -
"SSO Identifier":
Identificador SSO
-
-
German
-
"SSO Login Method":
SSO-Anmeldemethode -
"SSO Identifier":
SSO-Kennung
-
-
English
-
"SSO Login Method":
SSO Login Method -
"SSO Identifier":
SSO Identifier
-
-
Spanish
-
"SSO Login Method":
Método de inicio de sesión SSO -
"SSO Identifier":
Identificador SSO
-
-
Italian
-
"SSO Login Method":
Metodo di accesso SSO -
"SSO Identifier":
Identificatore SSO
-
Launching the analysis
Once your file is ready, you can choose it from your computer and launch the analysis.
Don't panic, launching the analysis doesn't mean the import starts and executes directly. It's first a simulation.
Once the analysis is launched, a new line will appear in the processing history.
Once the analysis is complete, its status and result will appear:
-
In case of Success, the file has been read correctly and you can, by clicking on "View", see the simulation results. If these results are consistent, you can then truly execute the import!
It is possible, despite a successful import, that warnings may appear in the results' visualization. These are simply alerts and do not prevent the import from running correctly. You can therefore ignore them.
-
In case of Failure, it means that the file is not good and you will see error messages in the results. In summary:
-
ERROR: Blocking
Major anomalies were encountered, preventing the correct processing of the file (missing column, missing mandatory data...).
-
WARNING: Non-blocking
Minor anomalies were encountered (e.g., extra space) but did not prevent the normal processing of the data.
-
STATISTICS: Non-blocking
Indicates the number of lines processed during file processing.
-
Tip: The "Cell" column allows you to define the exact location of the anomaly detected in your file. It is common to have to add +1 to the specified rows to get the actual affected row. (example: Row 265 = you will need to check row 266)
Here is the list of warning/error messages you may potentially encounter:
-
cleaned_string (WARNING): "Cell cleaned of unwanted characters"
-
must_exist (ERROR): "Cell cannot be empty"
-
invalid_header (ERROR): "Invalid column header, the first must contain the column names" (or an extra column therefore not processed)
-
missing_column (ERROR): "Column XXXXX missing"
-
invalid_phonenumber (ERROR): "Invalid phone number: French format expected (+331 23 45 67 89)"
-
no_applicable_backend (ERROR): "File format is not as expected"
-
not_found (ERROR): "Community or service not found"
-
must_be_email (ERROR): "Provided information does not look like an email"
-
uniq_email (ERROR): "Email address XXXXX is present multiple times in the file"
-
uniq_personnel_id (ERROR): "Employee ID XXXXX is present multiple times in the file"
-
upsert_uniq_email (ERROR): "An invitation already exists for this email address XXXXXX"
-
upsert_uniq_personnel_id (ERROR): "An invitation already exists for employee ID XXXXXX"
-
community_without_admin (ERROR): "There would be no more administrators in your community after the import, so the processing was canceled"