Provisioning (SCIM Protocol)
Provisioning is a term used to refer to directory synchronization. For example, Okta is a directory. Other terms are used; Okta is also said to be an “identity provider”. (a term that will be used most often).
Example of provisioning behaviors:
A user is assigned to the Steeple application in Okta: the user is found or created in Steeple
A user is removed from a group/deleted from the application/disabled in Okta: it will no longer exist in Steeple.
Provisioning is a powerful tool that avoids certain time-consuming activities for community administrators, of which identity management is one.
SCIM in all this?
SCIM is a protocol to follow when developing such a feature. For this to work well, you have to comply with this protocol.
PROVISIONING : STEEPLE / OKTA
REMINDER : it is mandatory to have configured the SSO before starting the configuration of the provisioning. Neither Okta's nor Steeple's configuration allows this.
In steeple:
Administration > Integrations > Install

Then click on Identification, to display two parameters needed to configure provisioning: the tenant URL and the **Secret Token** :

In Okta:
Okta App Overview > General > App Settings > Edit
In the general settings, provisioning is not enabled by default. So you have to do it manually and click on Save:
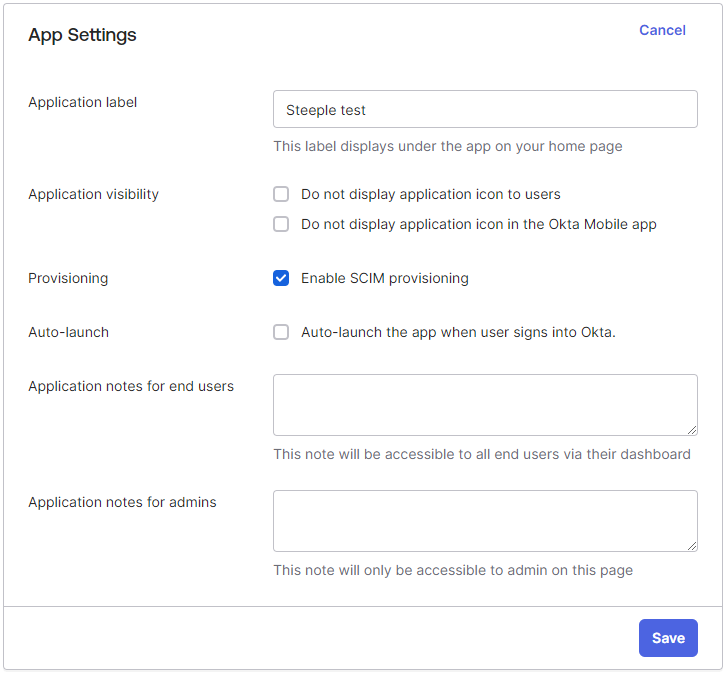
After saving these new settings, a “Provisioning” tab appears above next to “Sign On”. Click on Provisioning.
Then click on Edit to modify the Provisioning integration on Okta.
This step is simple:
1- Copy the Tenant URL in Steeple and paste it in the "SCIM connector base URL" field in Okta
2- In Okta, in the “Unique identifier Field for users” field, put: userName
3- Check only the boxes “Push”
4- In the "Authentication Mode" drop-down menu, select HTTP Header
5- Copy the Secret Token in Steeple and paste it in the “Authorization” field in Okta
6- Save

Do not forget to test the connection by clicking on “Test Connector Configuration”. This will test each of the actions selected previously by sending a request to the Steeple server to verify that a connection is well established between the two applications.
Still in Okta:
App Okta Overview > Provisioning > Settings > To App > Edit :
In order to retrieve the list of profiles in Steeple, all users must be assigned once the provisioning has been set up; this is how Okta works.

App Overview > Assignments > Assign > Assign to People (ou Groups)
The last step consists of activating the synchronization on Steeple.
Once this last action has been completed, a list of profiles is imported into Steeple.
Unlike other identity providers, Okta operates changes made almost immediately.


As an administrator, you also have the option of deleting this access method to return to a so-called “classic” authentication system, with e-mail and password.
As an administrator, you also have the option of deleting this access method to return to a so-called “classic” authentication system, with e-mail and password.
To do this, simply uncheck the box to break the synchronization.