Automatic directory synchronization
Provisioning (SCIM Protocole)
Provisioning is a term used to refer to directory synchronization. For example, Azure Active Directory is a directory. Other terms are used; AzureAD is also said to be an “identity provider”.
Example of provisioning behaviors:
A user is assigned to the Steeple application in Azure: the user is found or created in Steeple.
A user is deactivated in Azure: it will no longer exist in Steeple.
Provisioning is a powerful tool that avoids certain time-consuming activities for companies, of which identity management is one.
SCIM in all this?
SCIM is a protocol to follow when developing such a feature. For this to work well, you have to comply with this protocol.
MICROSOFT AZURE ACTIVE DIRECTORY
REMINDER : it is essential to have configured the SSO before starting the configuration of the provisioning. Neither AzureAD's nor Steeple's configuration allows this.
In steeple:
Administration > Integrations > Install
Then click on Identification, to display two parameters needed to configure the provisioning: the tenant URL and the **Secret Token** :
In Azure:
Annuaire Overview > Provisioning
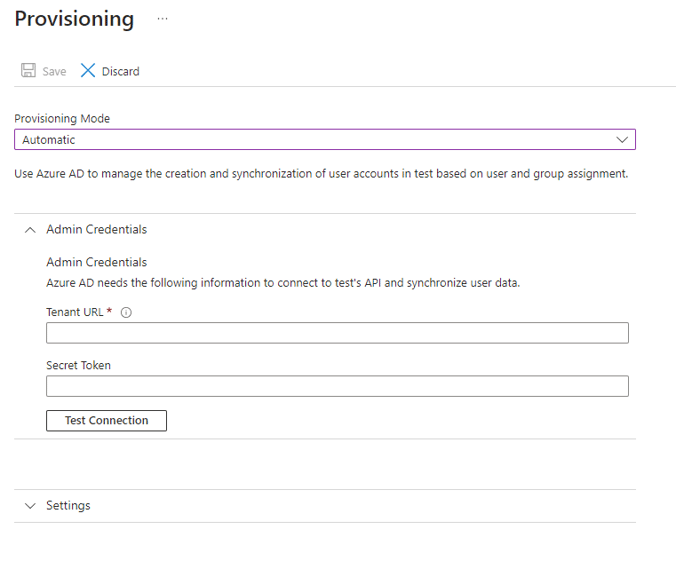
In this “Provisioning” tab, AzureAD automatically selects the “Manual” mode. For us, you have to select the mode “Automatic ". You must then copy-paste the tenant URL and the Secret Token in the appropriate fields then click on “Test Connection”:
Note : No other mapping is required on Azure regarding the user's role management.
Next you will need to add your users to the application. From the tab "Users and Administrators" select your groups already created.

Reminder : it is strongly advised to have at least two groups for each community : one for the users, one for the administrators.
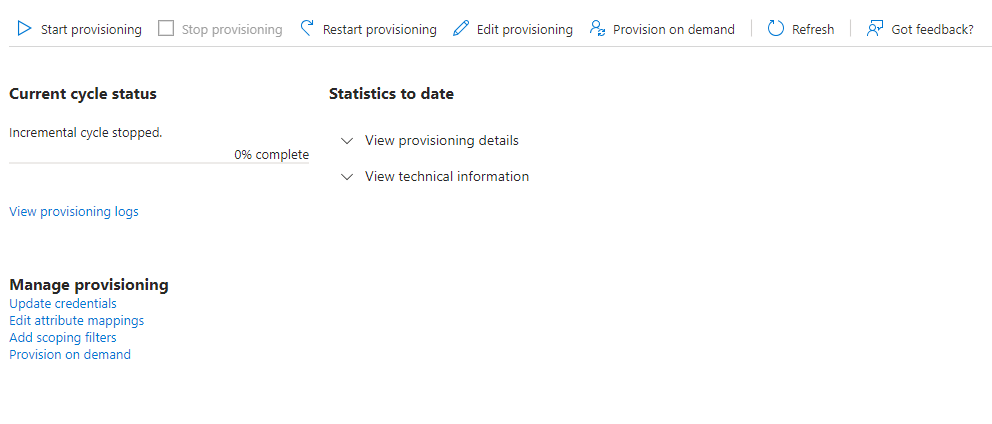
Next, you must then activate the provisioning. To do this, nothing could be simpler: click on “Start Provisioning”. If all goes well, a successful connection notification will appear in AzureAD.

The number of synced users then appears in Azure.
Note: Azure Active Directory updates every 25-40 minutes. A change in the directory may not be reflected immediately in Steeple but several minutes later.
Following this configuration on Azure and the activation of provisioning, Steeple will receive the list of profiles obtained during this activation. You must then assign the different roles to your groups and related communities:
Once this step is completed, you can click on Take the next step.
The last step is therefore to activate the synchronization, by simply checking the button.
As an administrator, you also have the option of deleting this access method to return to a so-called “classic” authentication system, with e-mail and password.
To do this, simply uncheck the box to break the synchronization.